
The back story
A couple of years ago I got into HiFi and after acquiring a Thorens TD124 turn table that needs a full restoration I decided to start with the plinth.
The plinth below is an original 1960's plinth that came with the table and any audio store would have them in stock blank and cut them out for your turntable. This plinth was also a popular choice with the Garrad 301, TD124's biggest rival.
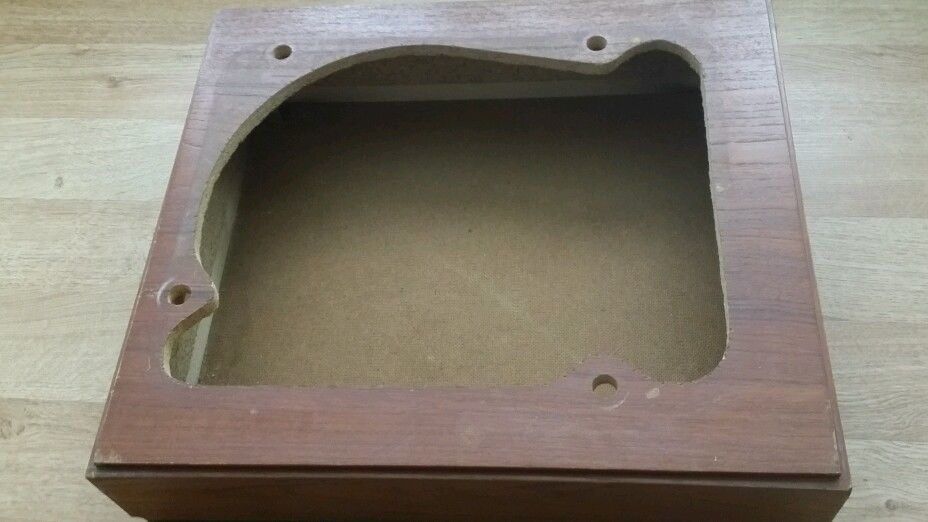
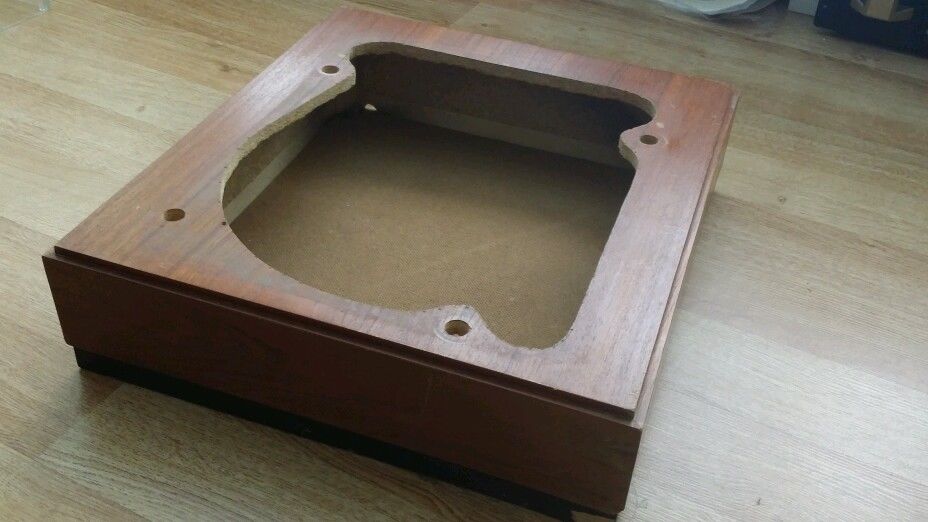
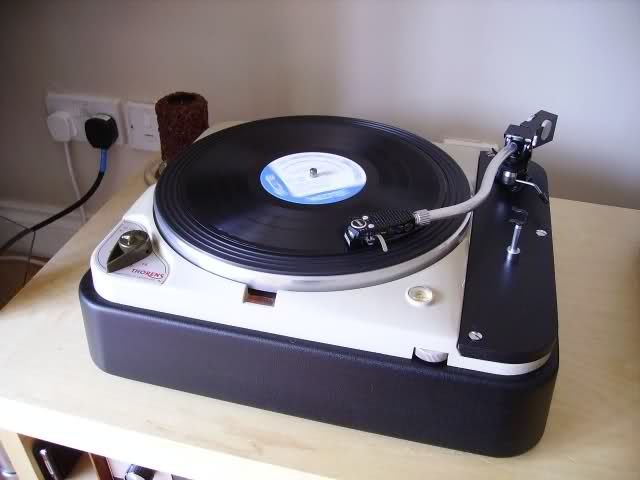
The plan is to design and make a similar plinth to this one but a solid body one, meaning no unwanted empty spaces. This will make the plinth more solid and heavy which will make it better at isolating vibrations and won't cause it to sag over time which can hamper the positioning and levelling of the turntable which is crucial to get right in order to achieve peak performance out of the turntable and get it looking something like this:
Design
First off, I found some original schematic of the cutout required for the table on google:
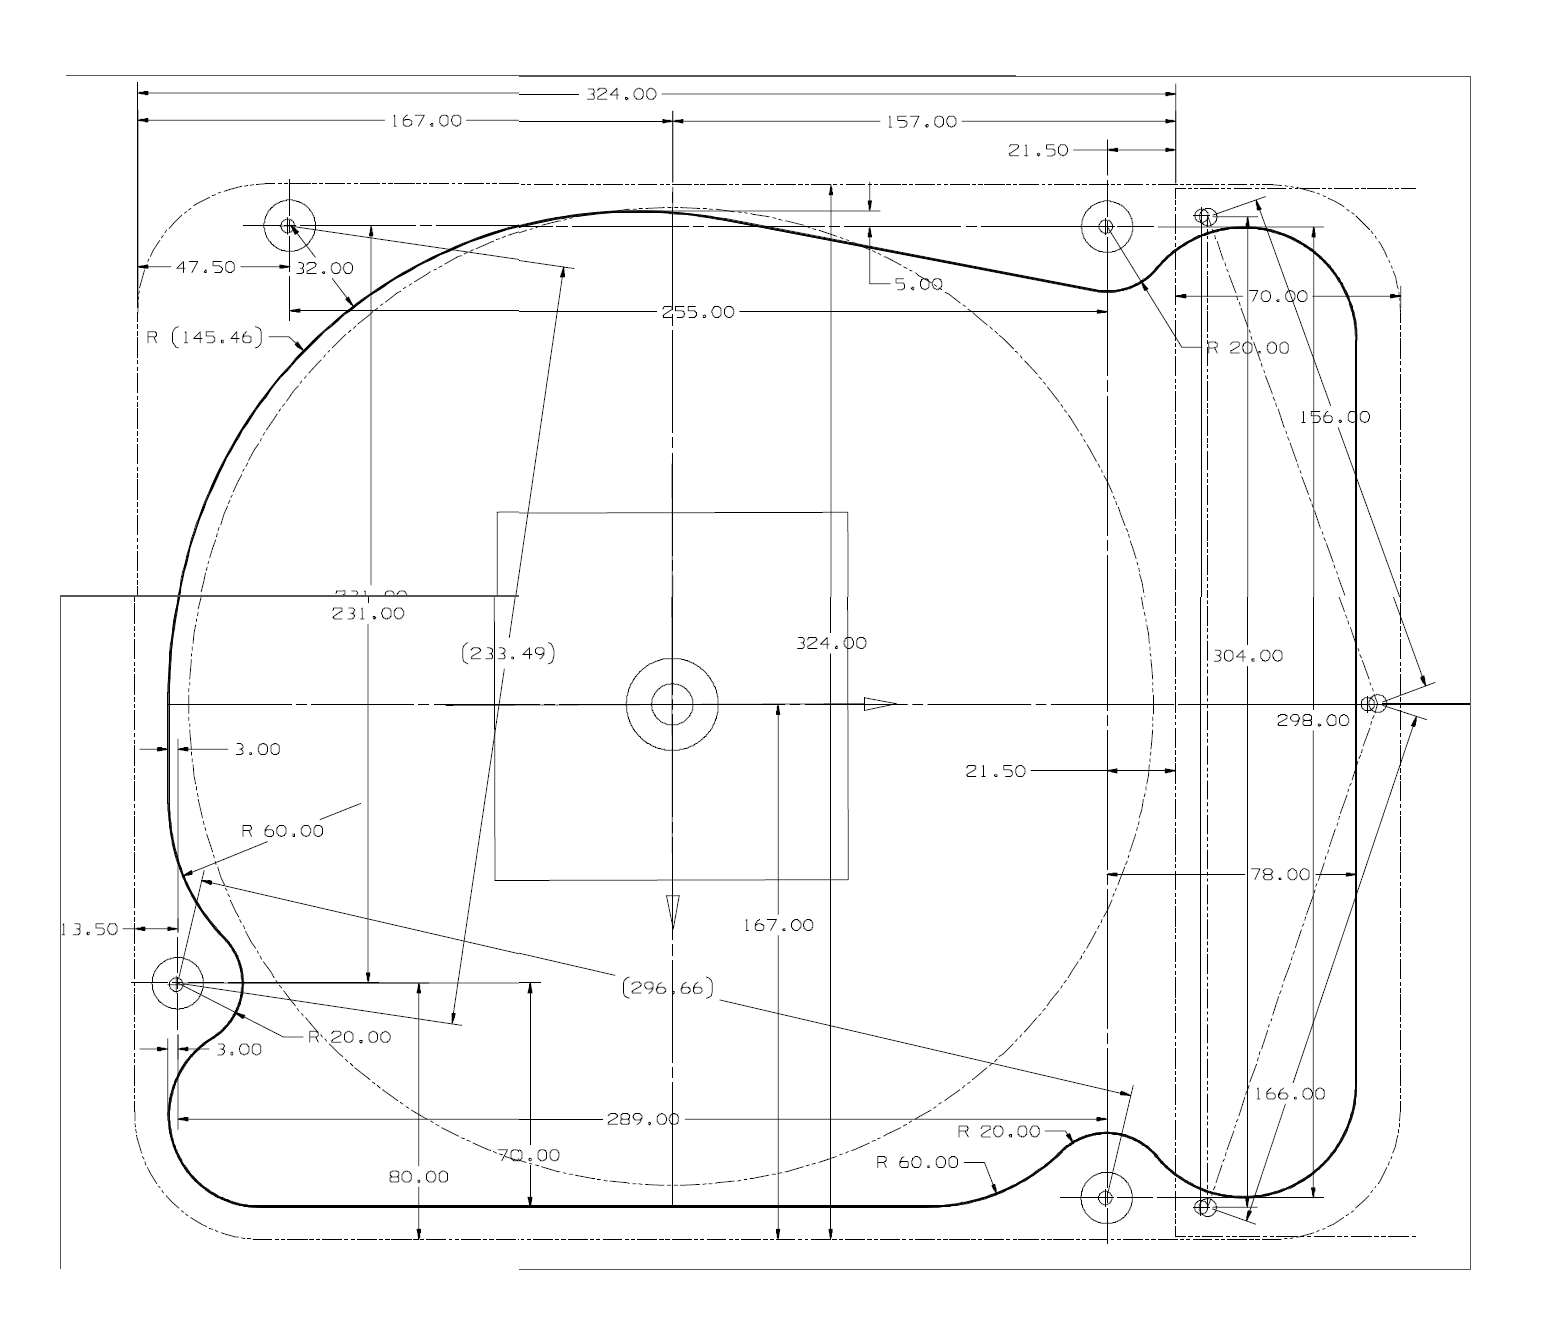
This schematic shows the location and size of holes required in order to fit the turntable into the plinth as well as other dimensions such as height and width of the whole table which will be required to rescale the image.
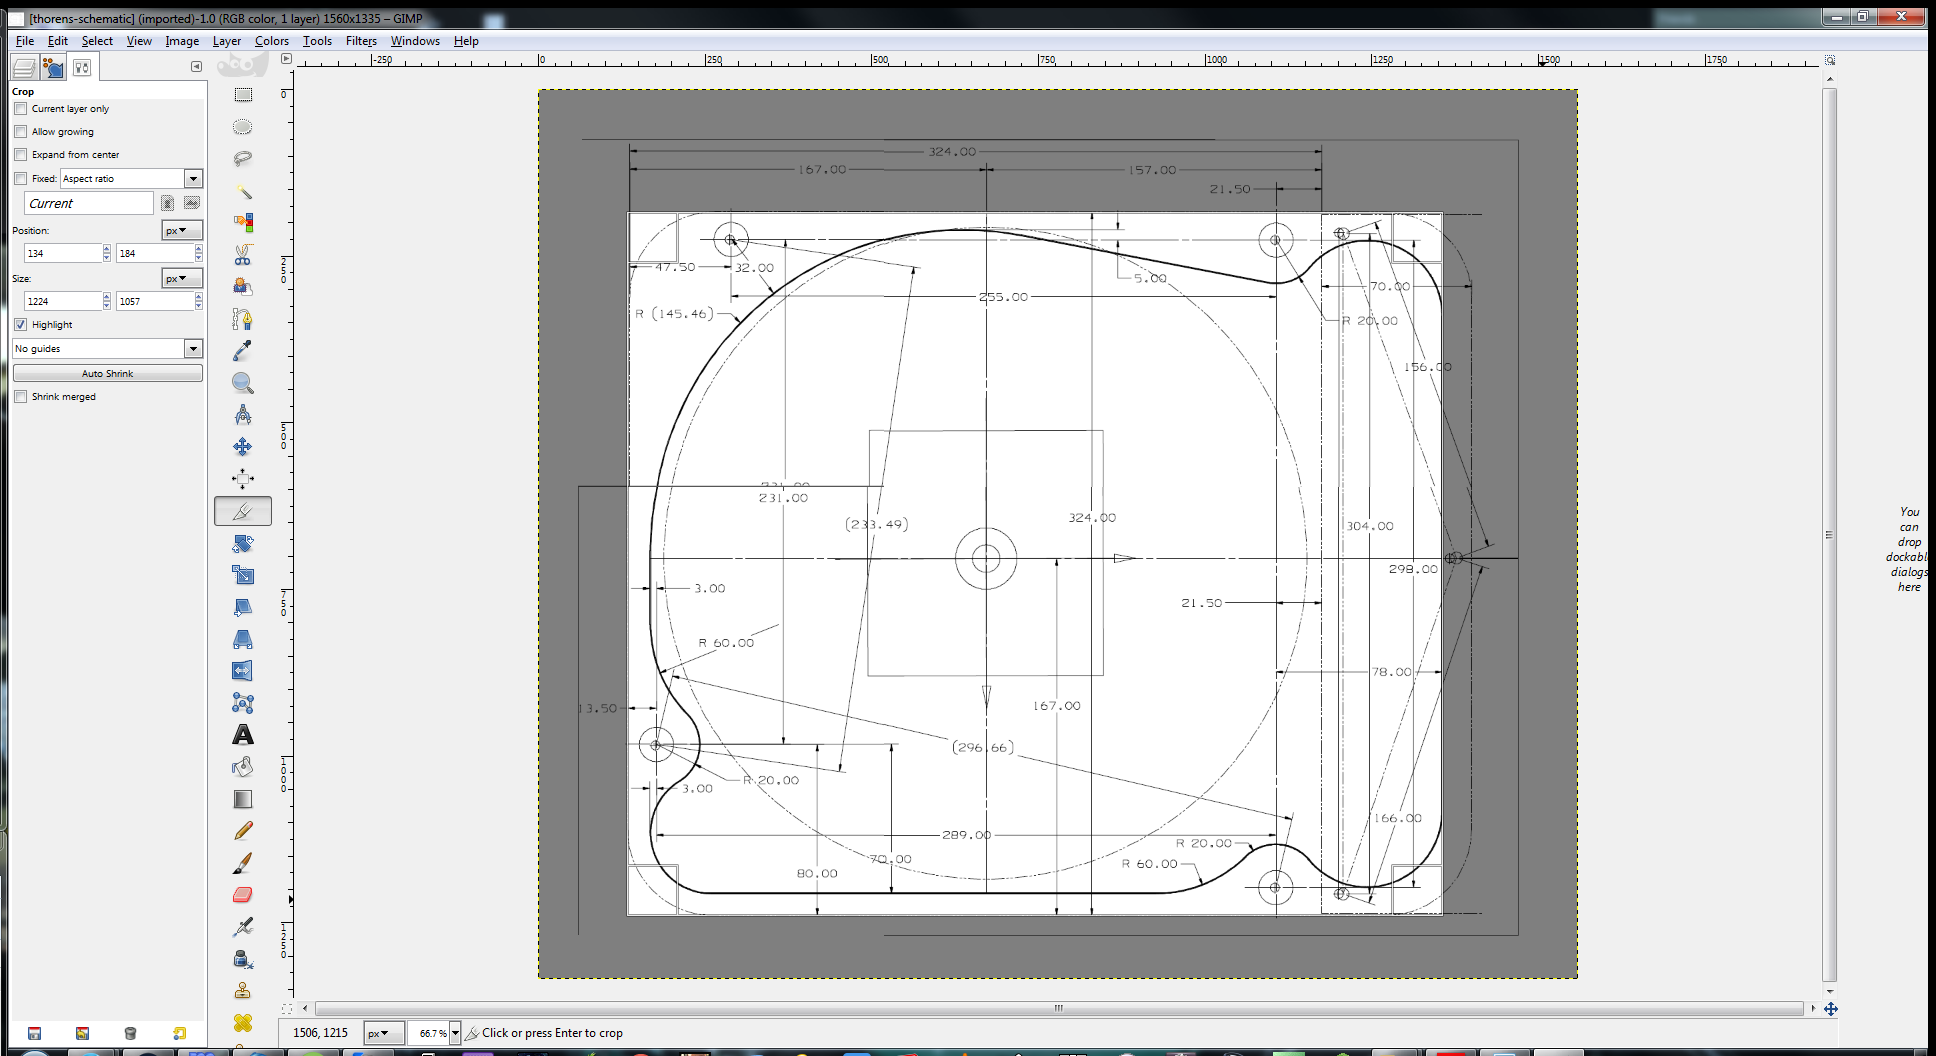
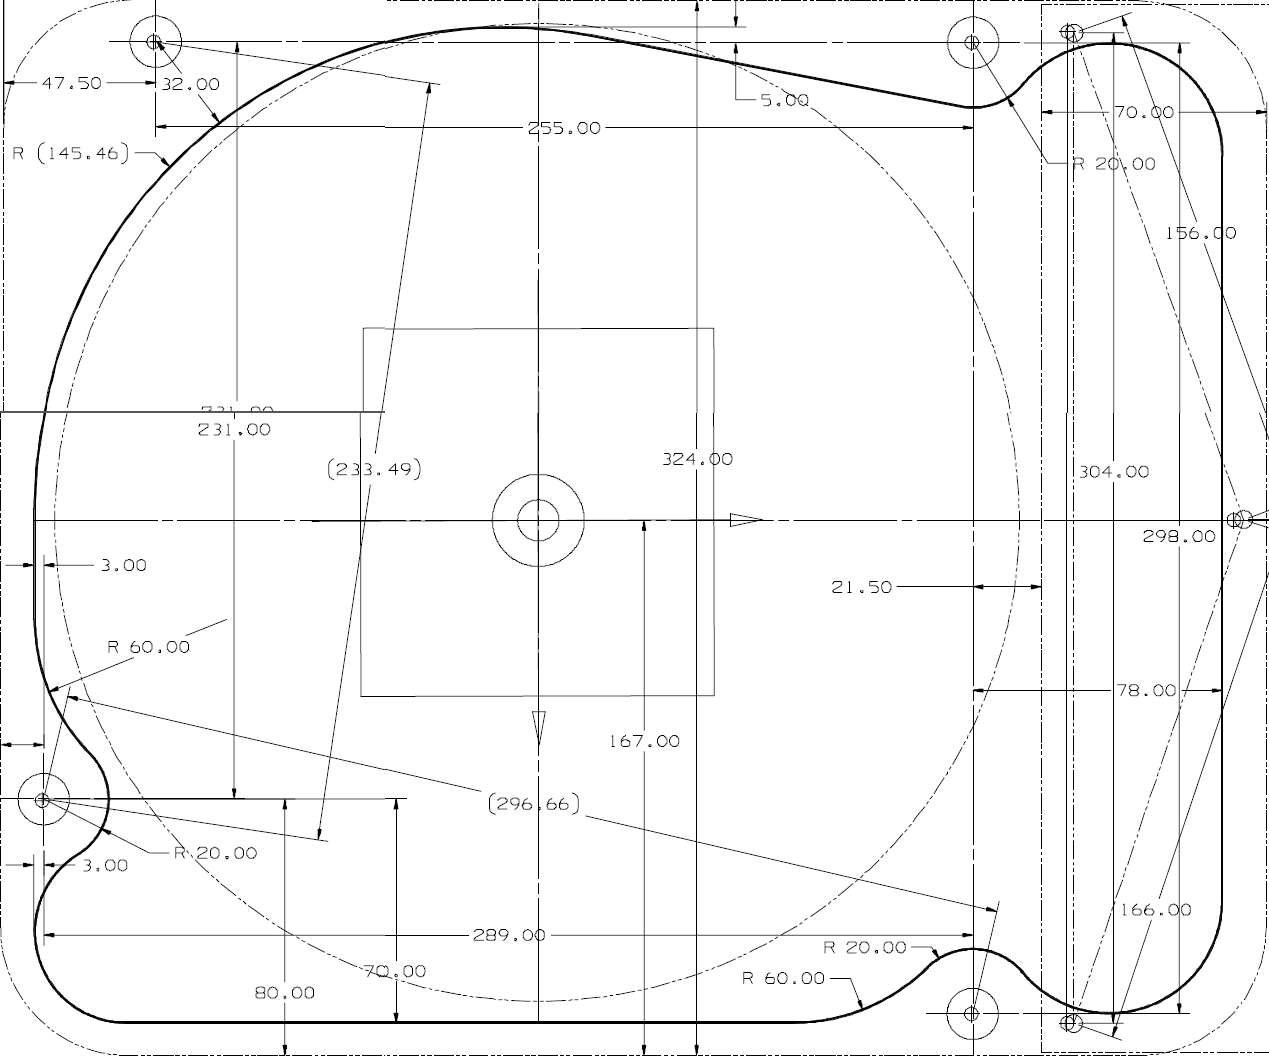
To resize the image to scale I firstly imported it to GIMP where i coropped it exactly to the actual size of the table size as shown here:
Then I saved the image as a PNG file, Opened Google Sketchup, imported the image to the paint bucket then paint bucket and resized it to its real life dimensions. Next, I created a big rectangle and painted it with the shcematic which gave me a perfect 1:1 drawing in sketchup. All i had to do then is resize the rectangle so that it fit the image perfectly.

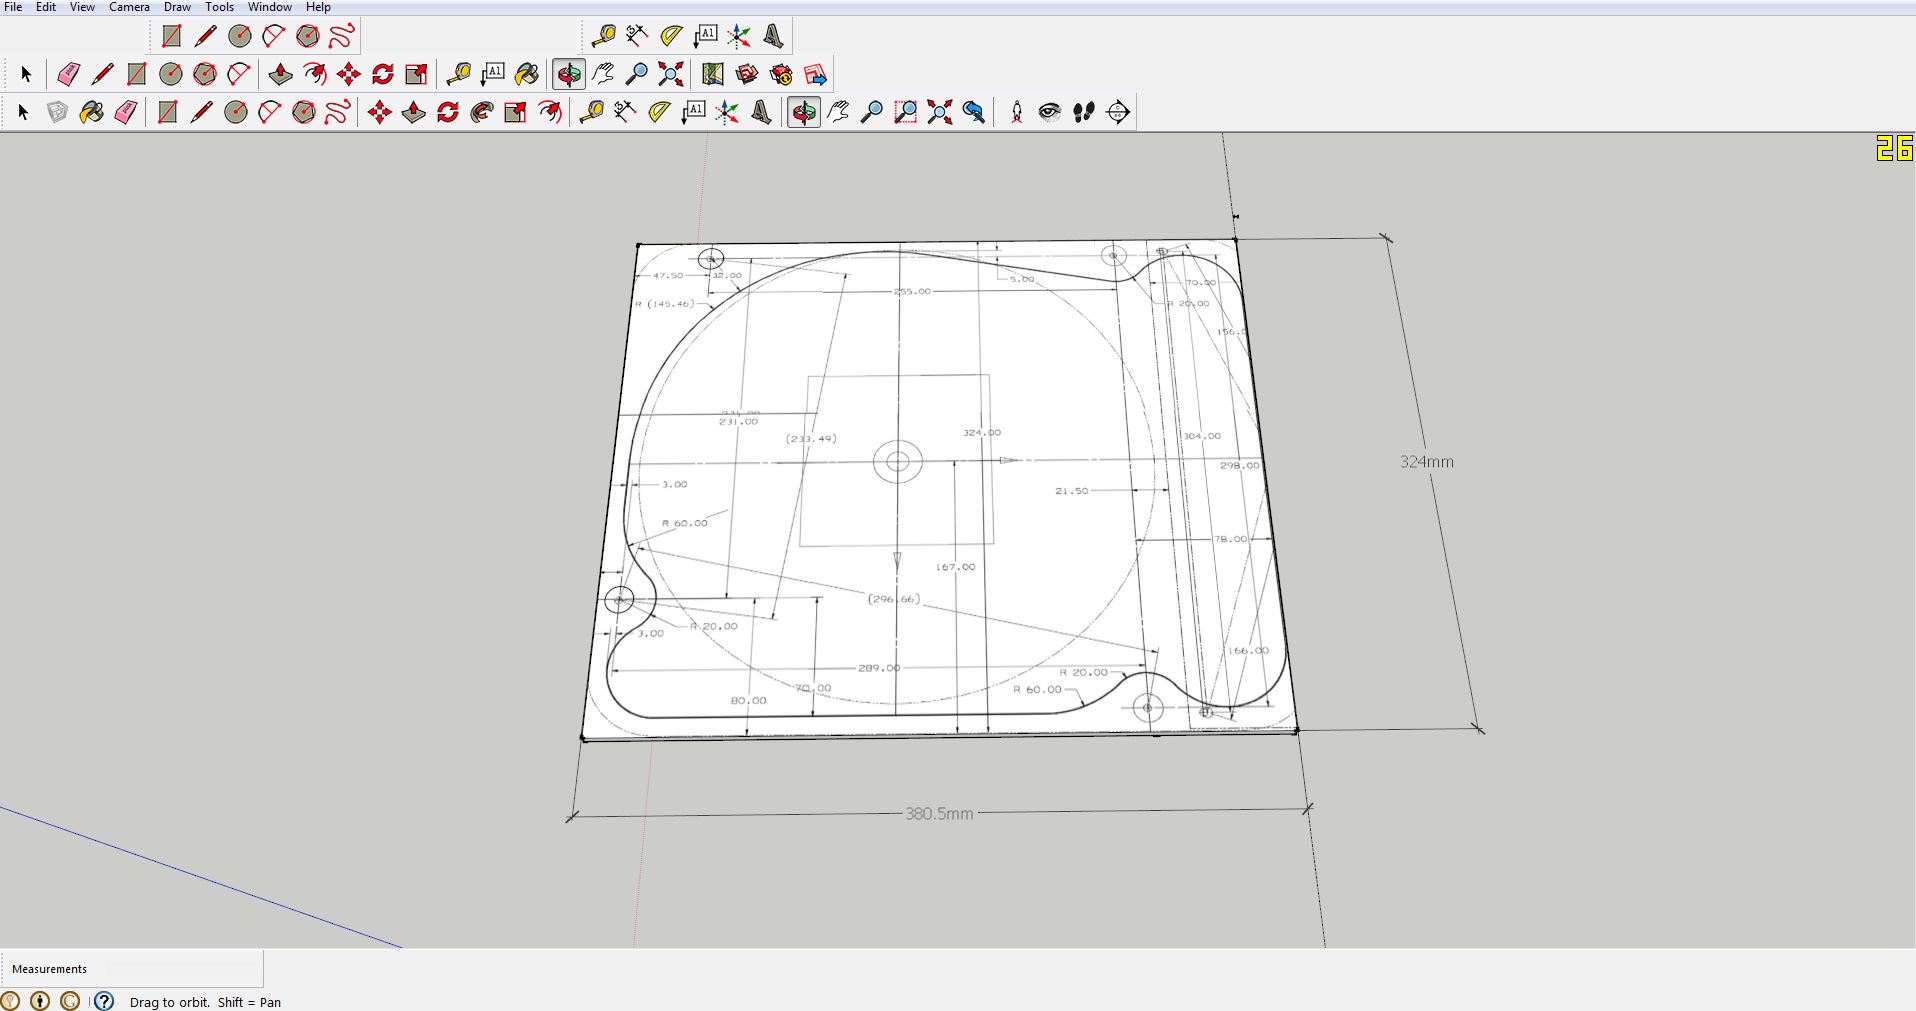
This way we make the image exactly the same size/scale as the real life full scale schematic. I then traced all the lines that need to be cut out triple checking and cross referencing all the dimensions with the original schematic and ended up with this:
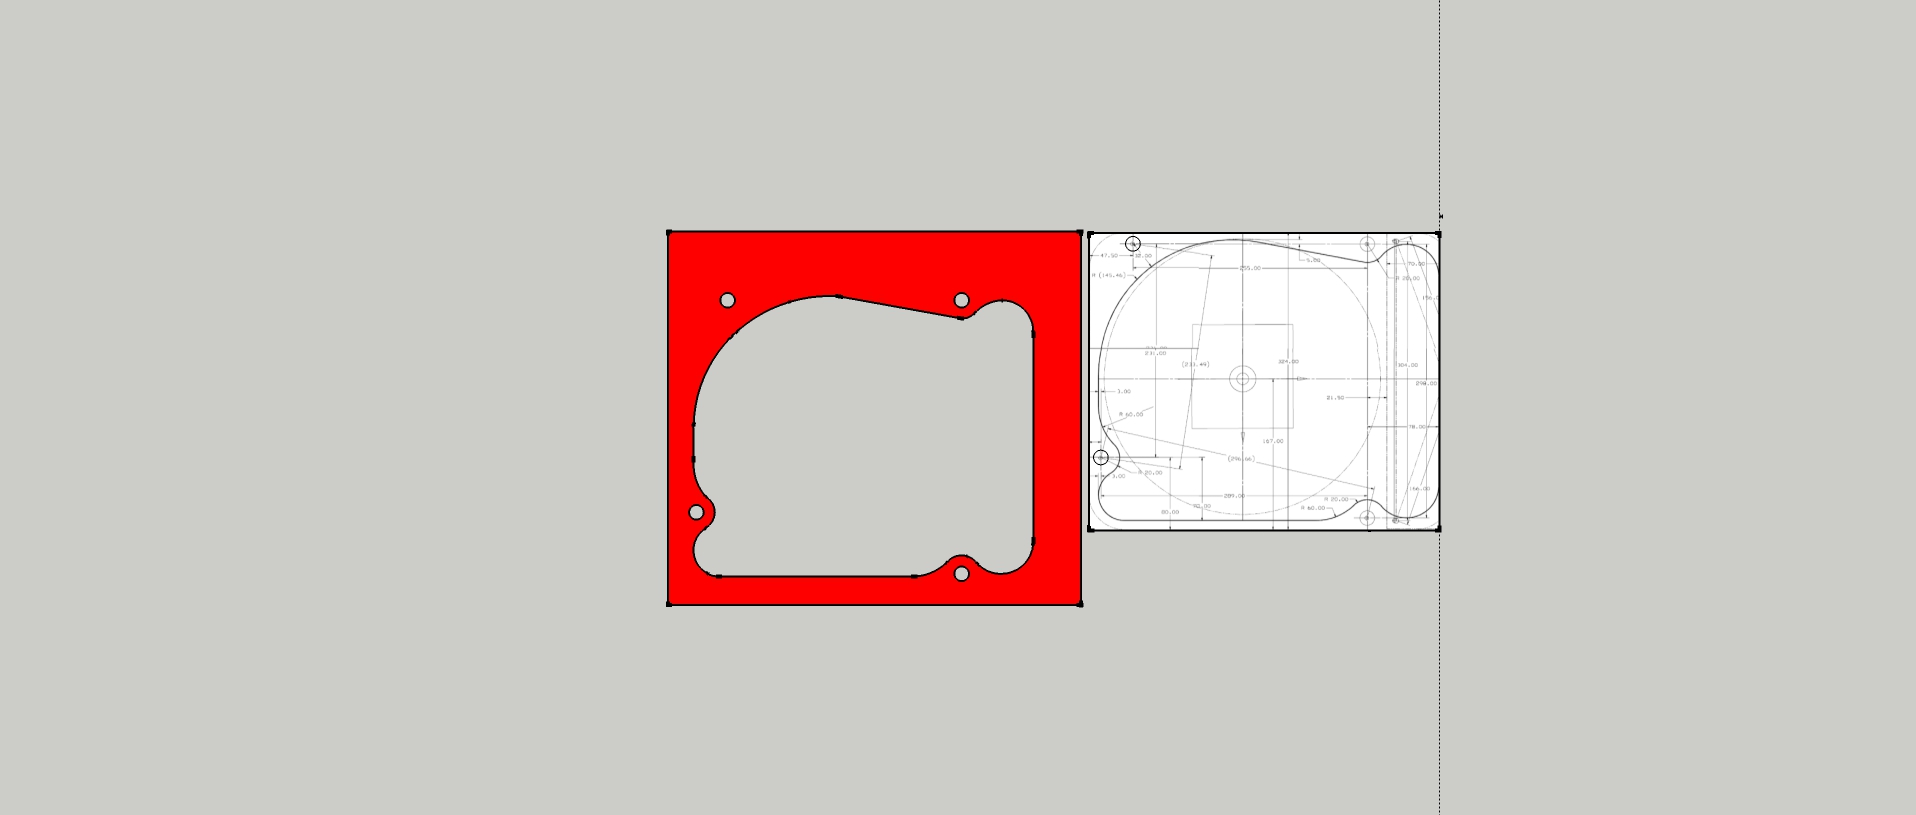
This template can now be exported as a .dwg file and sent to a laser cutting company to be cut out.
Testing the theory
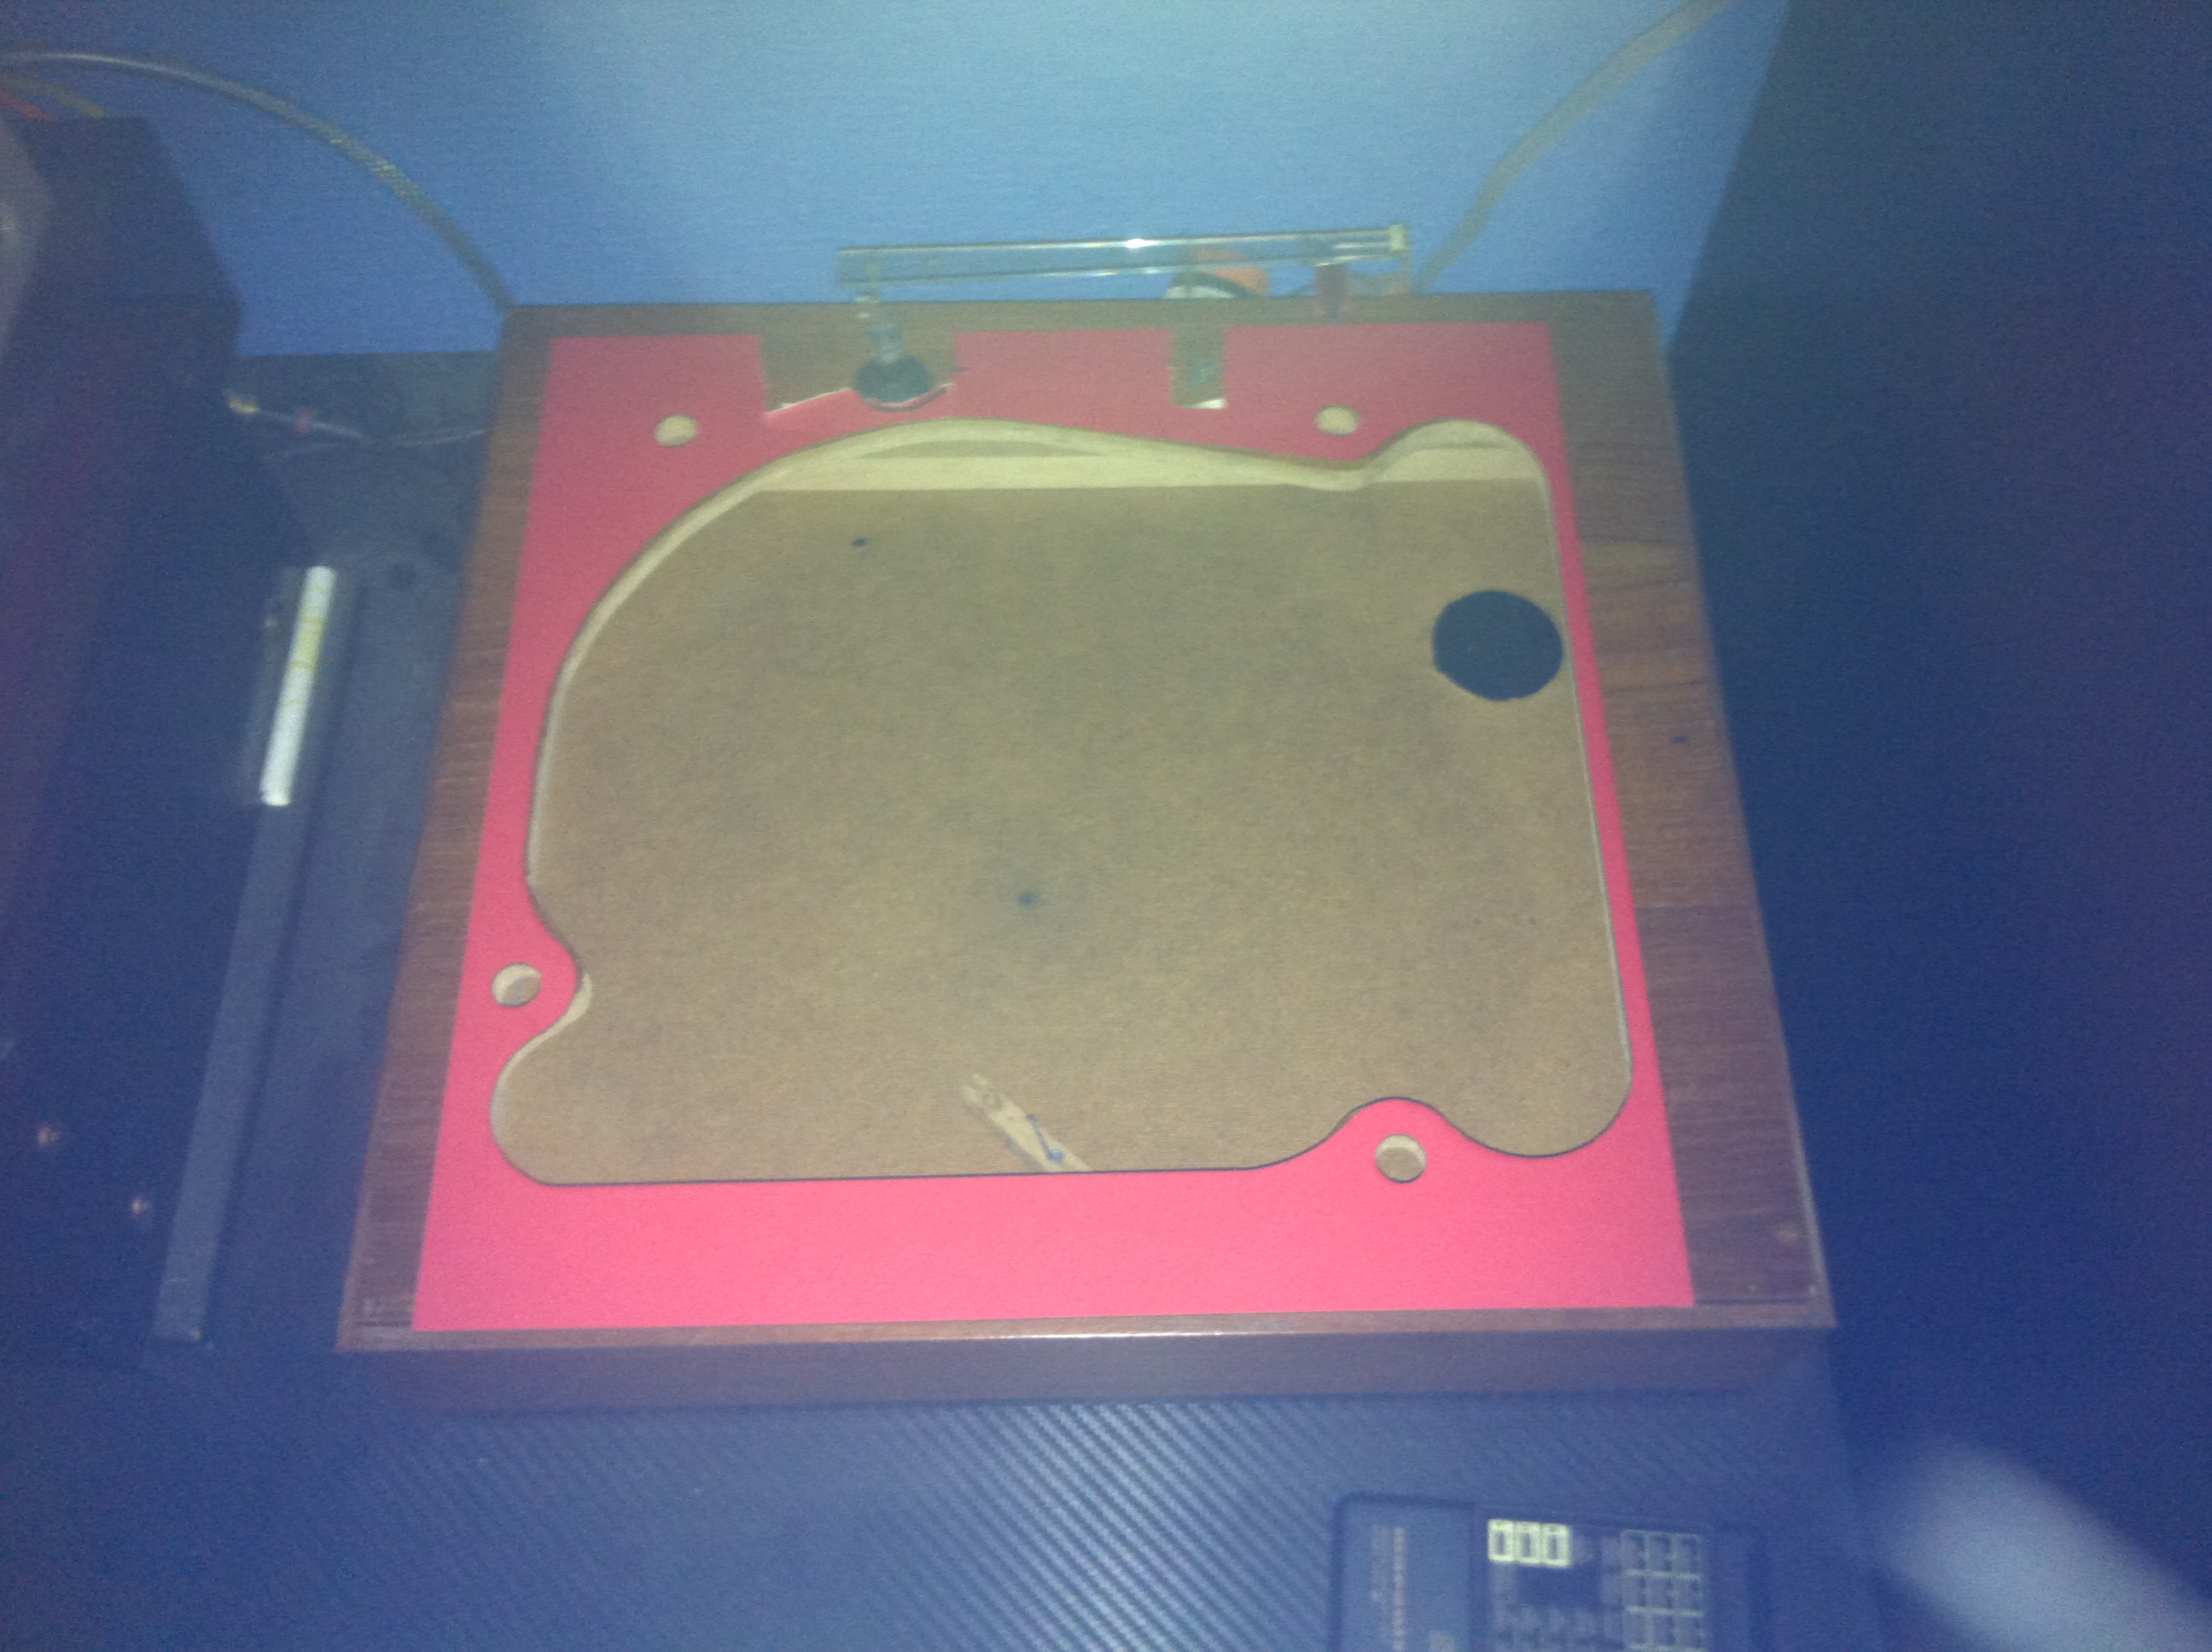
To cut this first test template I used a company called RazorLab. They charged me £10 and the process took about 2 weeks to comlete. Because this was just a test piece to see the fit It was cut in about 2mm thick red cardboard to reduce cost.
Here is the result, pretty much exactly the same if not better fit. This picture shows the template placed over the original old plinth:
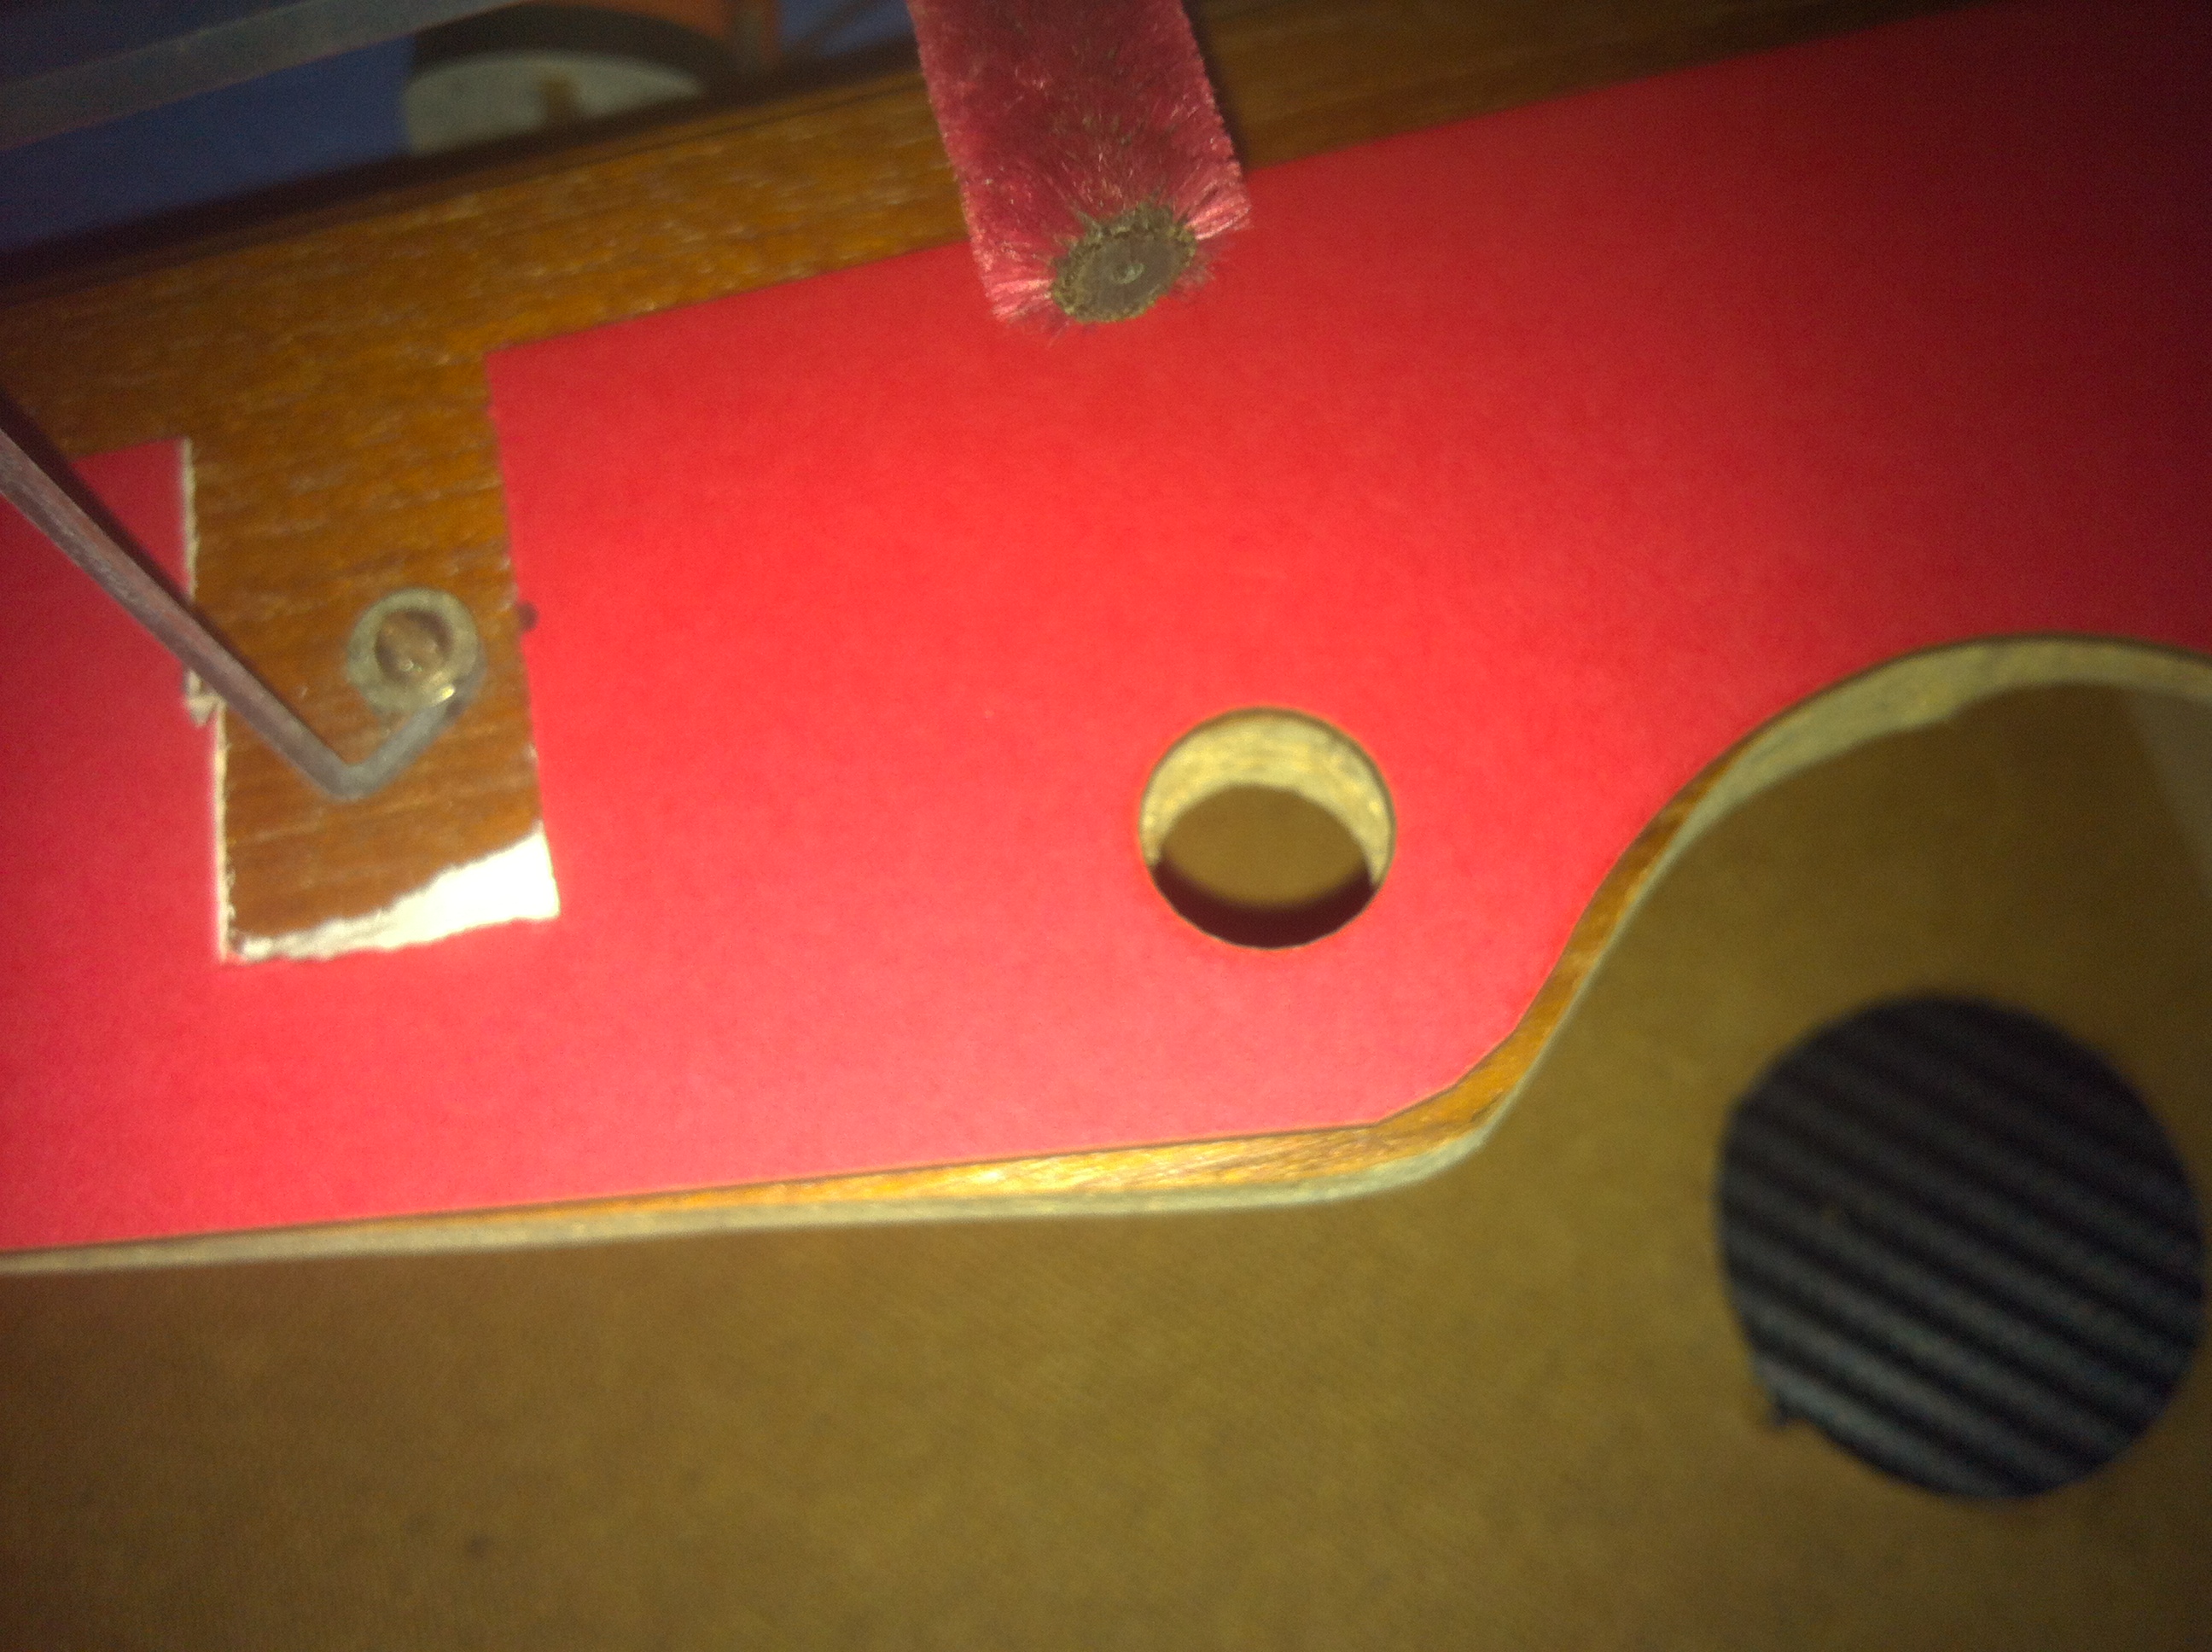
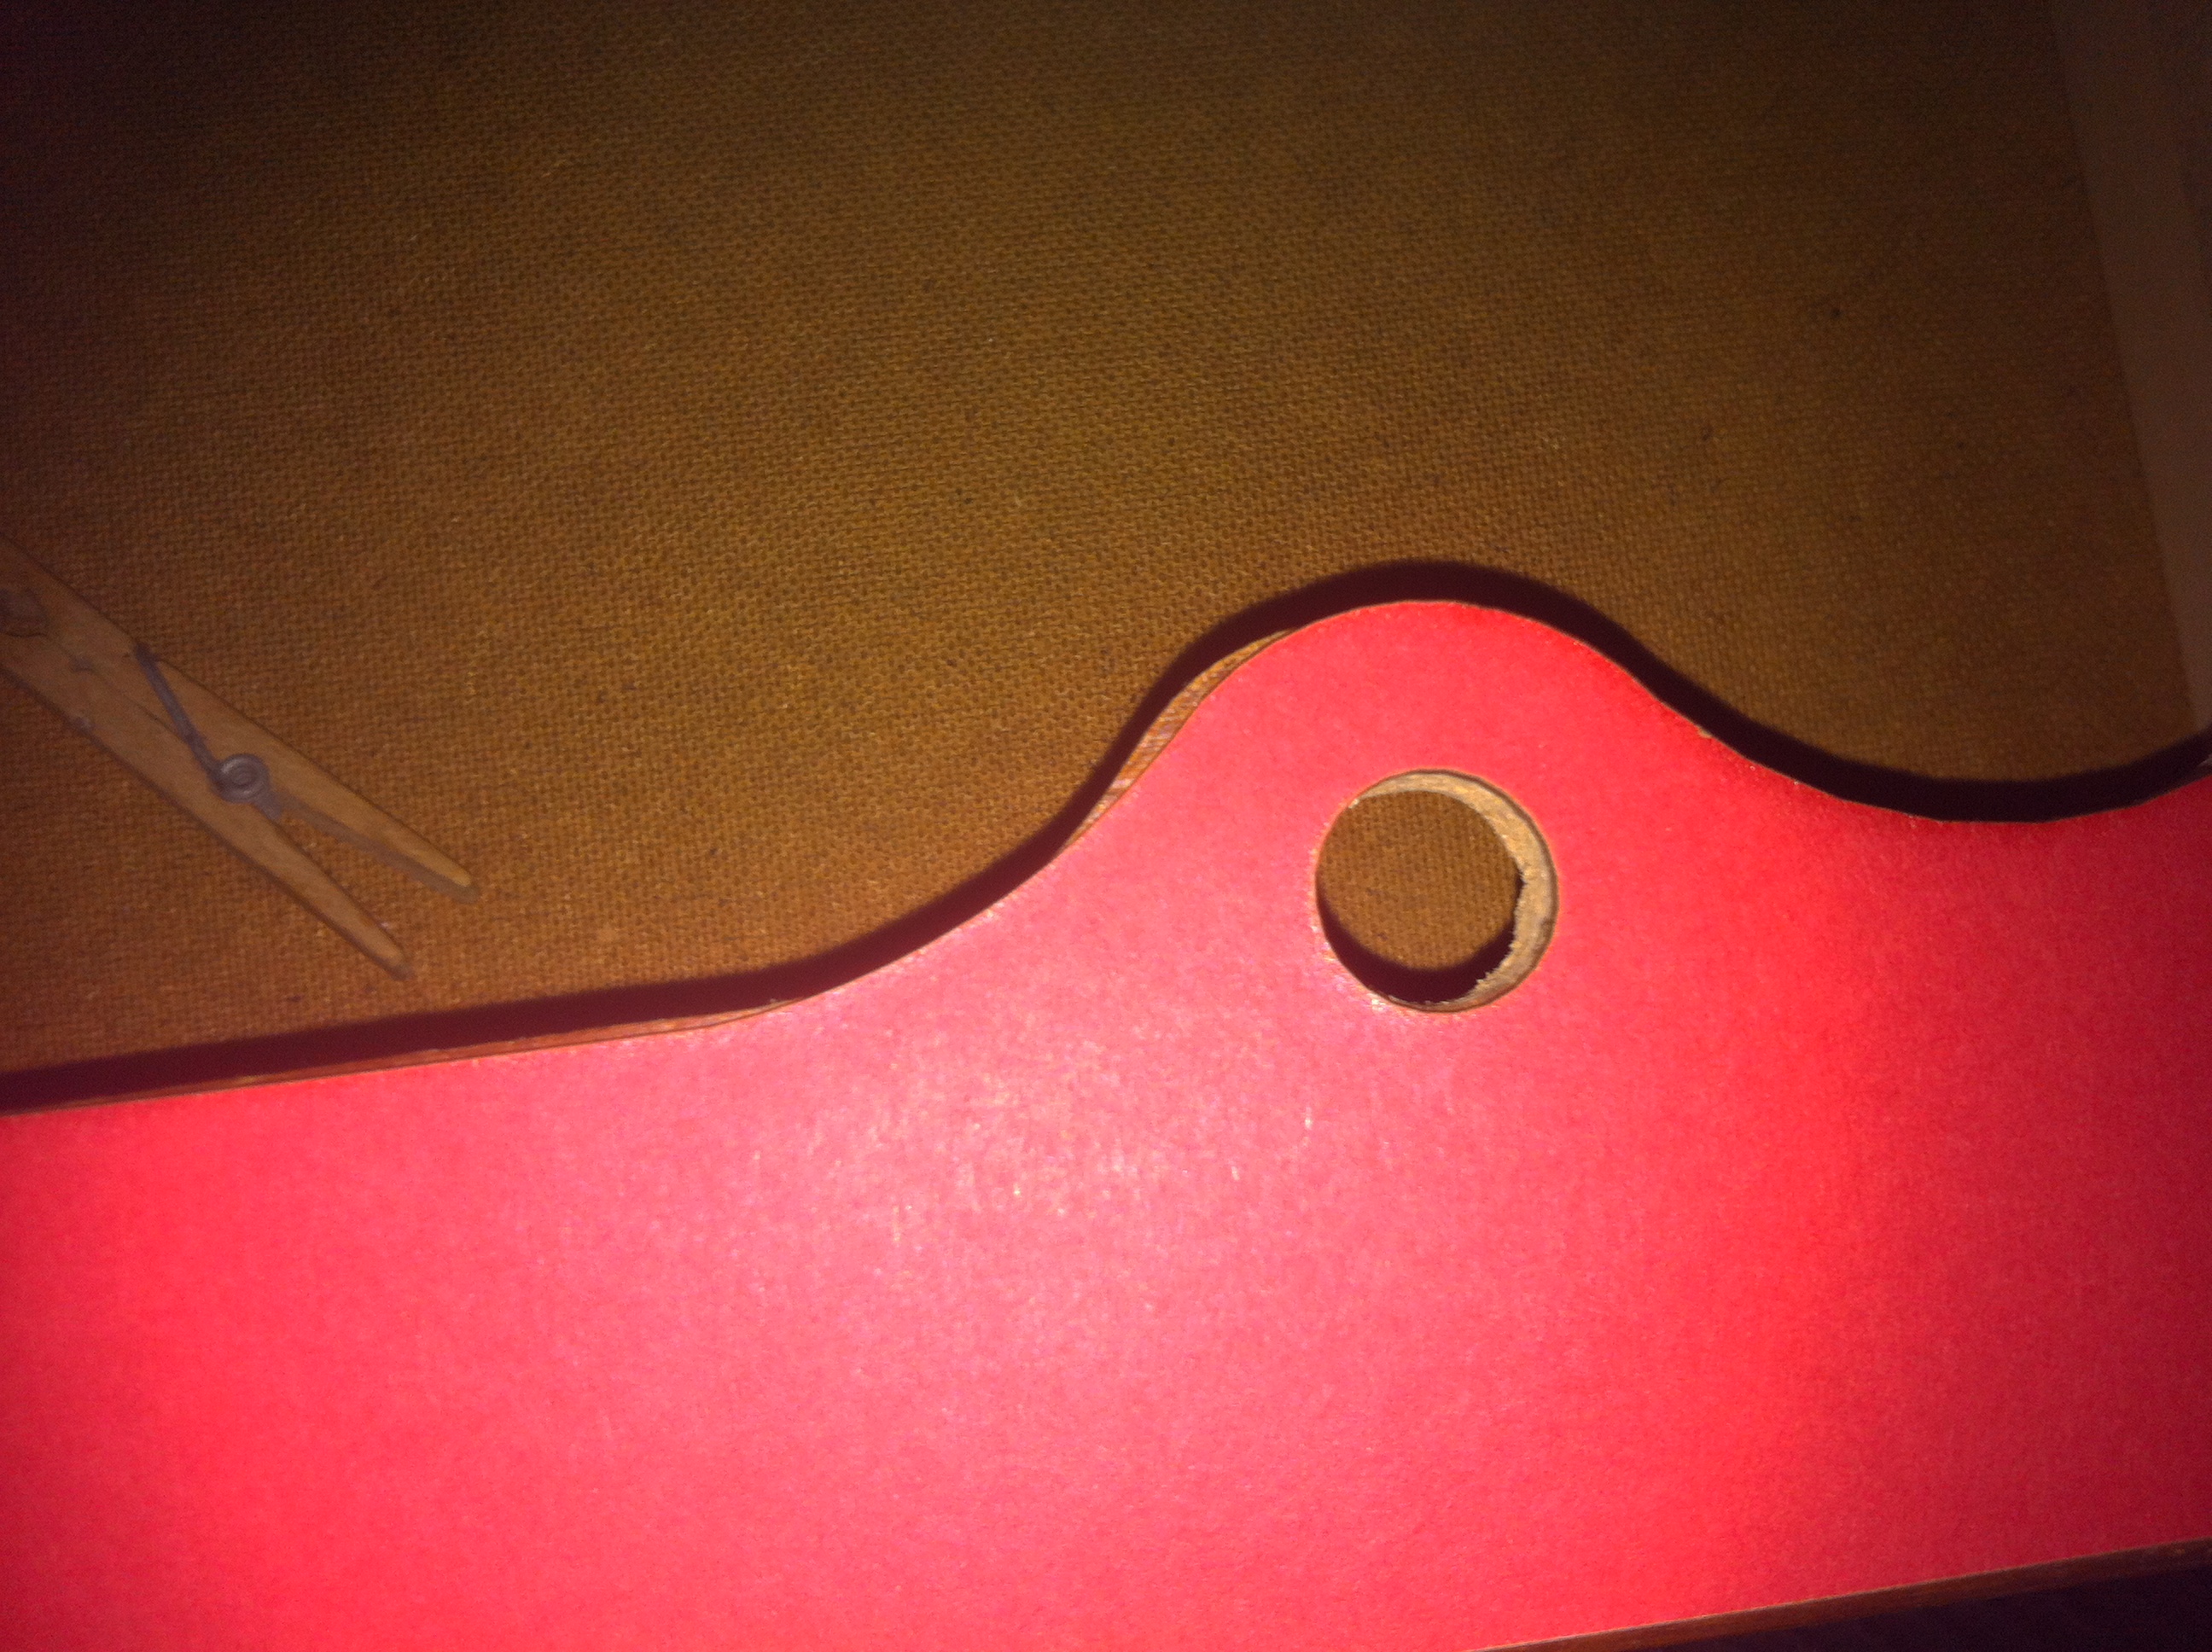
And more detailed shots:
OK, after knowing that my CAD template fits perfectly I went ahead and designed the whole Plinth in google sketchup. I chose 6mm MDF as my material because it’s cheaper than Plywood, it’s cheaper to cut and its a lot less softer and stiffer then Plywood which means it’s going to be better at dampening vibrations but harder to pain.
Modelling
To make a long story short, after hours and hours of making something, then realising it wasn't good enough here's the finished model:
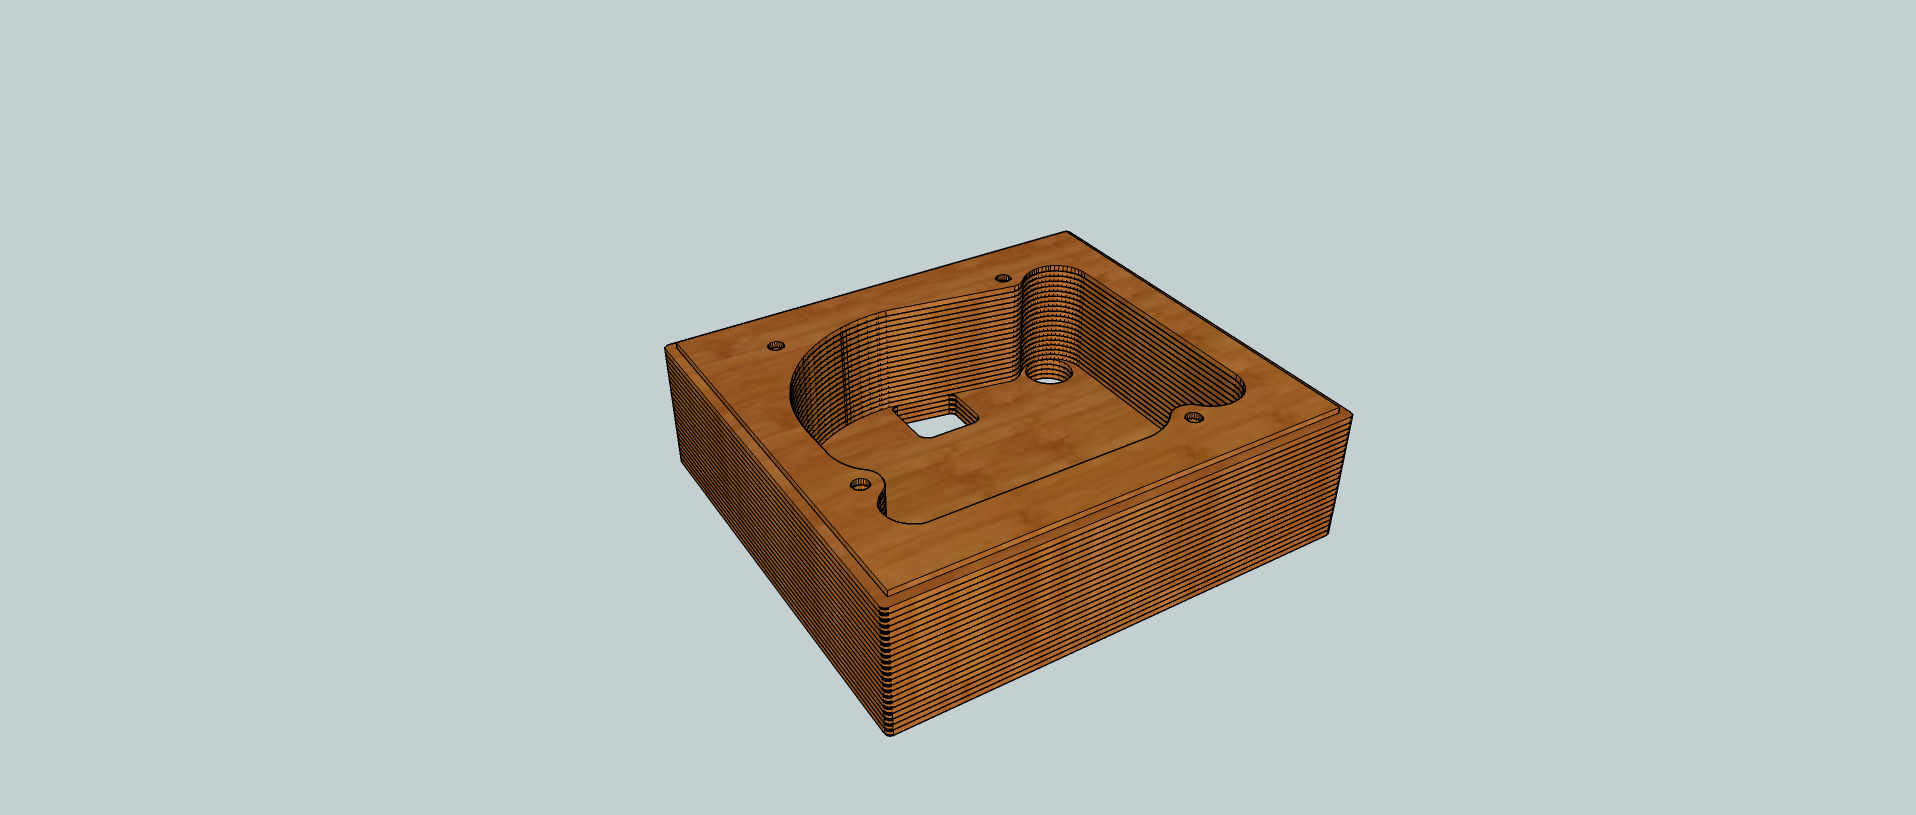

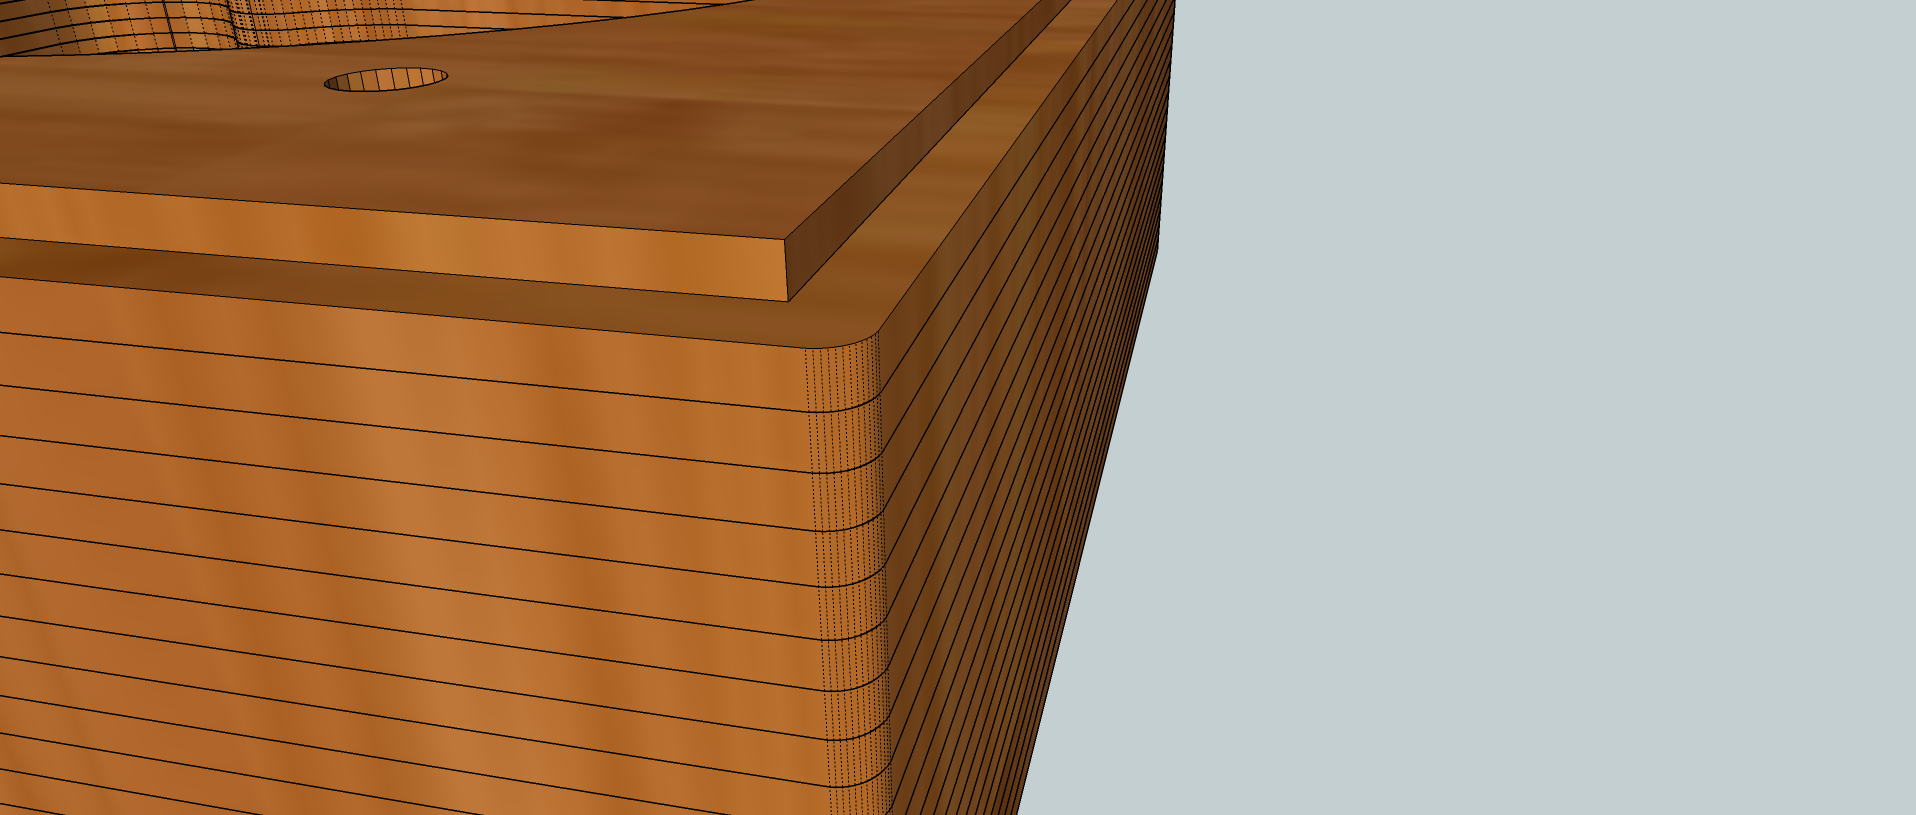
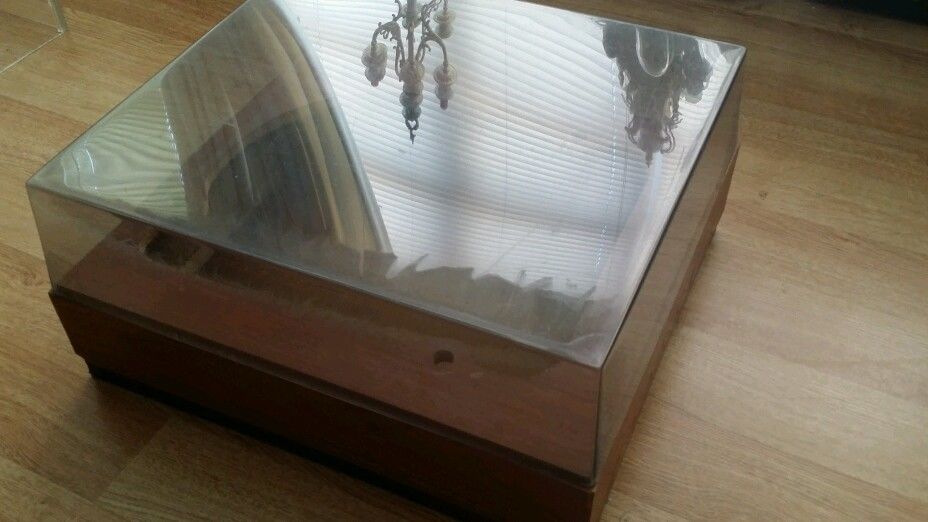
The plinth will consist of 23 layers of 6mm thick MDF giving us a total height of 138mm. The top most layer will be a little bit smaller than the rest to accommodate the plastic lid which i will re-use from the old plinth as seen in the last picture. The large square hole at the bottom will be used for the power cable and plug to pass through while the smaller circular hole will accommodate the RCA cables of the tone arm.
To make the whole laminating process easy I've decided to place 4 wooden dowels in each corner of the plinth to make them stack really easy without any need for jigs etc.
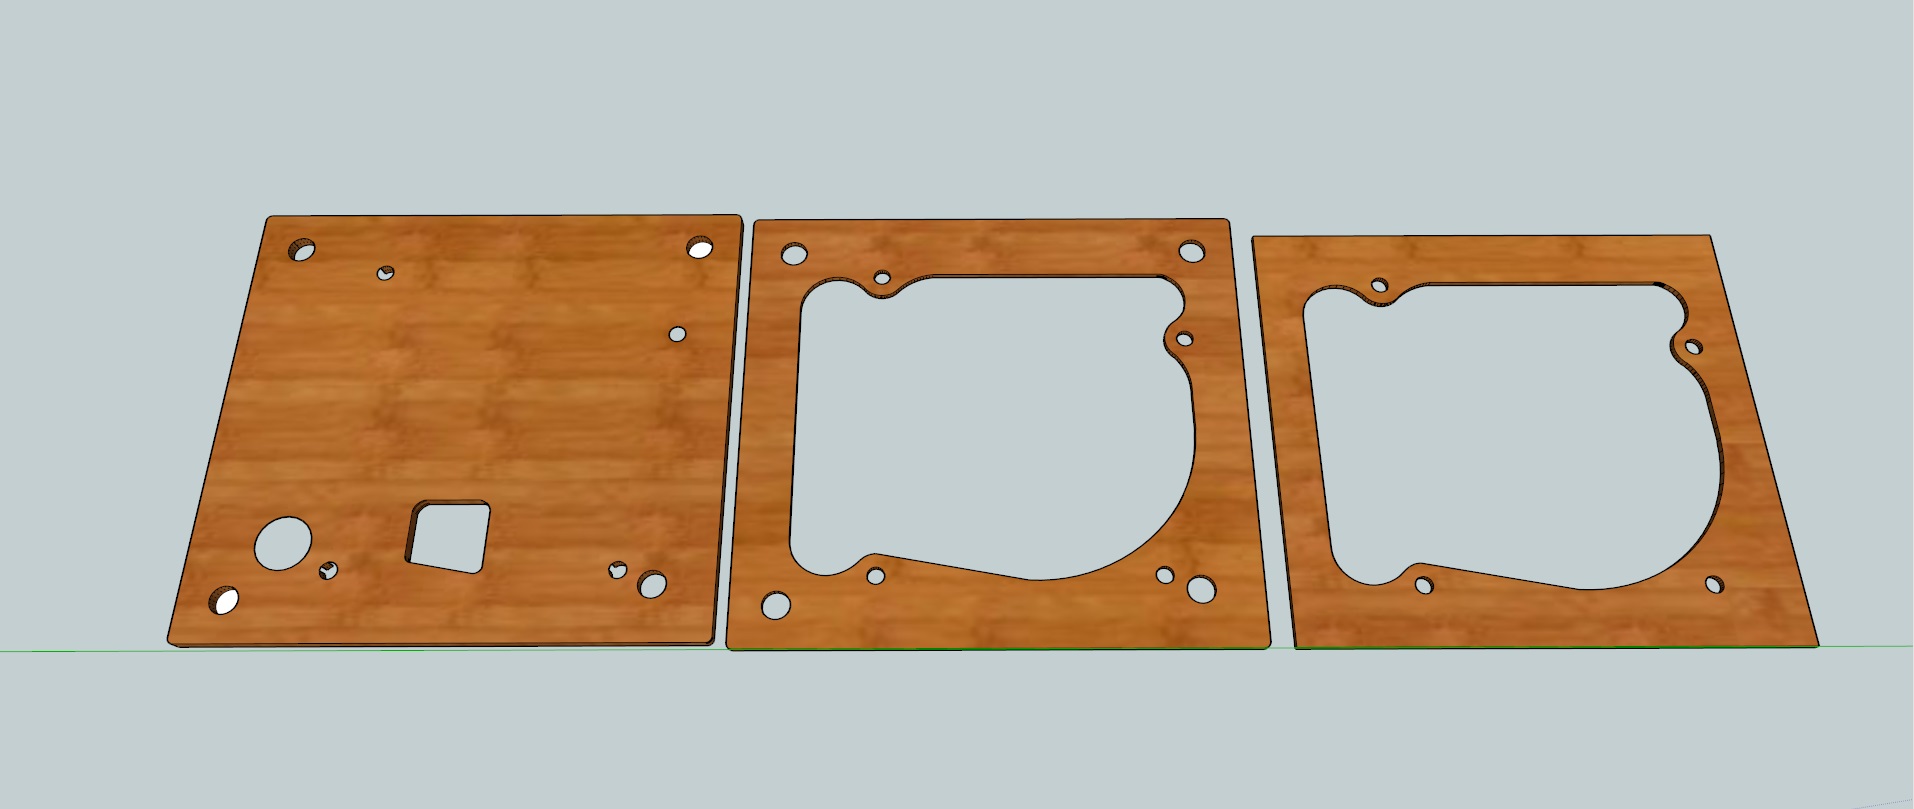
Pictures below show the 3 different pieces which make up the whole plinth.
We will have 4 off the first component on the left, 19 pieces of the component in the middle and 1 off the last one which will allow the lid to fit and hide the dowels.
After making the model and converting the relevant drawings into .dwg files I began to look for someone who could laser cut it for me. The company I chose is Pure Fine Laser because the price they gave me was £94 including materials, tax and shipping a ~15kg parcel and Jason, the guy who runs it was really really helpful when it came to chosing the material and thickness.
As promised, here's all the sketchup cad files.